
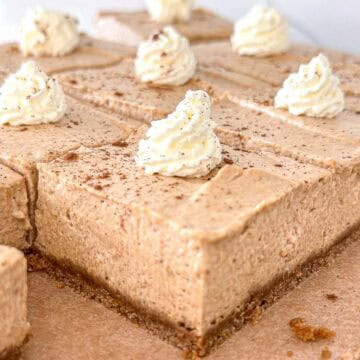
These No-Bake Pumpkin Cheesecake Bars have everything you'll want in a fall dessert: creamy, spiced pumpkin filling and a buttery graham cracker crust. The best part? They set up in the fridge, so there's no oven needed. Easy enough for a weeknight, yet special enough for the holidays.
These Pumpkin Cheesecake Bars are my go-to when I want an easy pumpkin dessert that looks fancy but is secretly low-effort. They're always a hit at gatherings with friends, and my husband loves them so much he requests them multiple times throughout the season. This recipe is a fun twist on my popular Mini New York Cheesecakes, swapping the classic vanilla filling for a no-bake pumpkin version.
I love no-bake cheesecakes because they're so easy to make and almost impossible to mess up-perfect for the busy fall season. They're also an ideal make-ahead Thanksgiving dessert because you can prepare them in advance, which means one less thing to stress about on the big day. The texture is lighter and creamier than a baked cheesecake, without being overly airy, so each bite feels rich but never heavy.
Pure pumpkin puree, warm spices, and creamy Greek yogurt give this dessert that autumn flavor we all crave, while the no-bake method keeps the process simple.
If you've ever felt overwhelmed by complicated cheesecake recipes, this is your fix. No water baths, no cracked tops, and no stress-just smooth, creamy, pumpkin perfection in every bite.
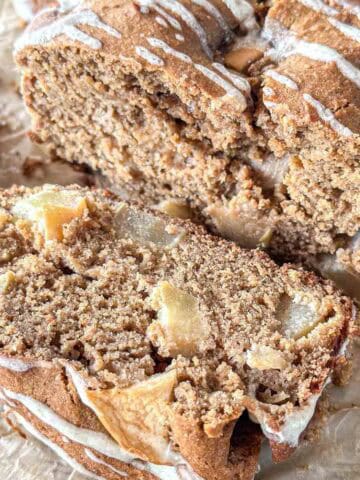
If you are looking for more cozy fall baking recipes, check out my Pumpkin Spice Sugar Cookies, Apple Sourdough Bread, Pumpkin Sourdough Muffins, or my Pear and Apple Galette.
Jump to:
Ingredients You'll Need
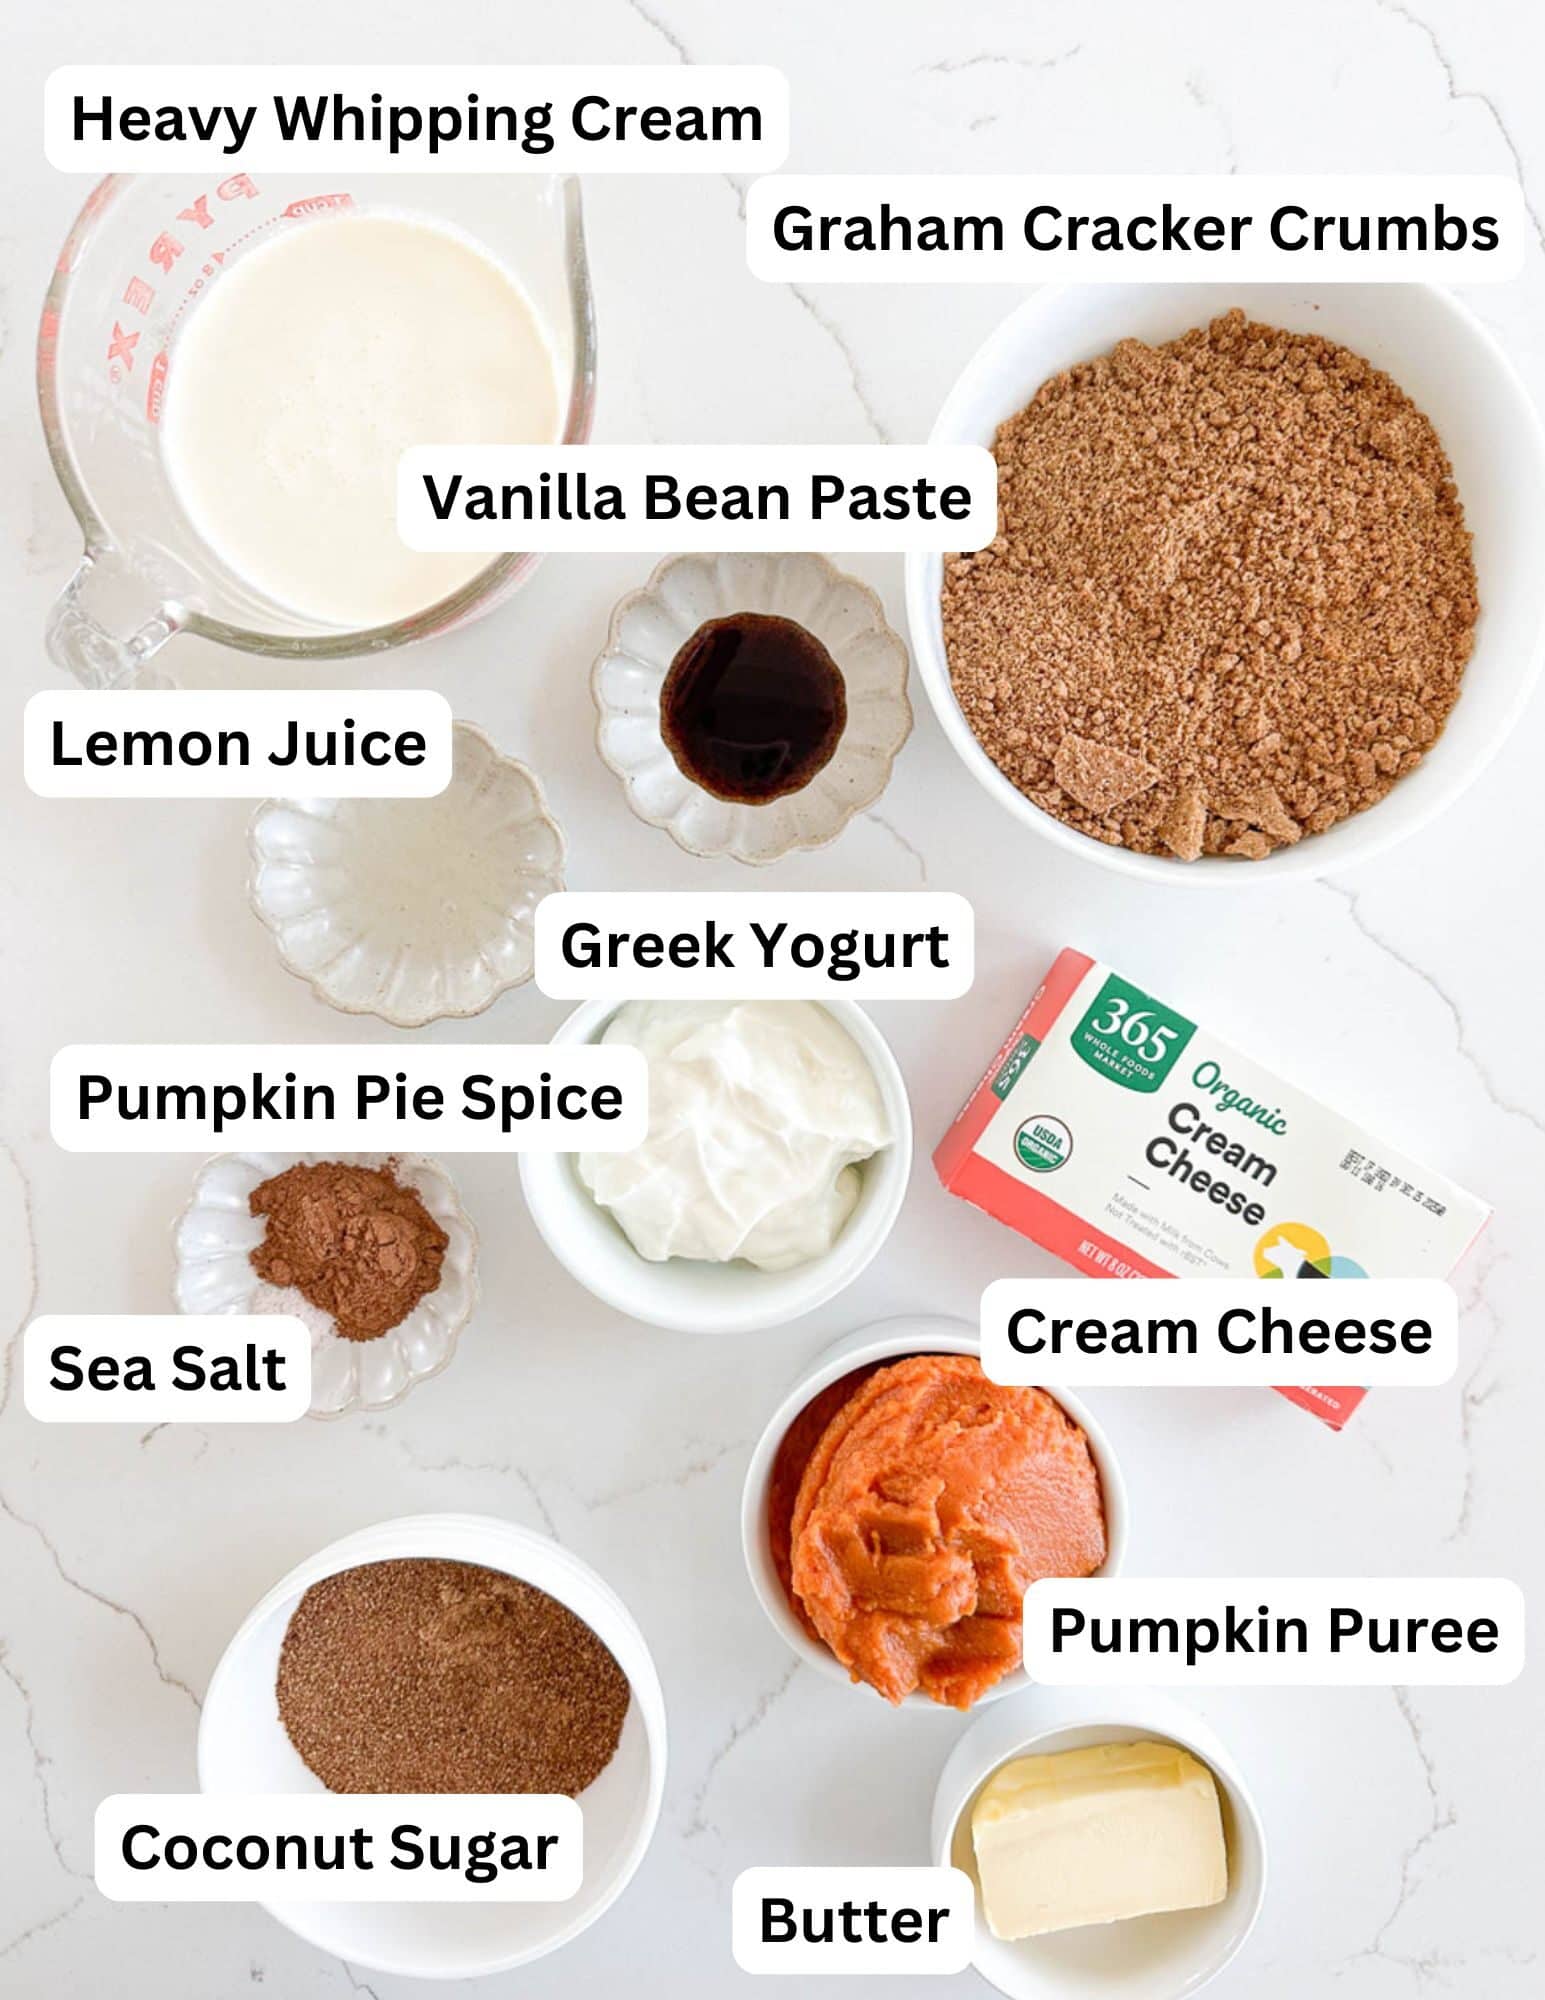
- Graham Cracker Crumbs: The foundation of the crust, giving these bars their signature sweet, buttery crunch. I use Simple Mills sweet thins as they're gluten-free, refined sugar-free, and made with real food ingredients like almond flour and organic coconut sugar. They have a naturally wholesome taste and still achieve that classic cheesecake crust texture. You can use regular graham crackers if you prefer, but the quality of the cracker makes a difference in flavor.
- Unsalted Butter: The key to binding the crust together and adding rich, indulgent flavor. I always use Kerrygold grass-fed butter for its deep, creamy taste and higher quality. Grass-fed butter also has a richer yellow hue and a higher butterfat content, which makes the crust extra flavorful; perfect for pairing with pumpkin spice desserts.
- Cream Cheese: The heart of the cheesecake filling, delivering that smooth, tangy, melt-in-your-mouth texture. Full-fat cream cheese is essential-it sets better, tastes richer, and creates a creamier consistency. Avoid low-fat or whipped cream cheese for this recipe to keep your no-bake cheesecake bars stable and rich.
- Coconut Sugar: Adds a warm, caramel-like sweetness that complements the pumpkin and spices beautifully. It's an unrefined sweetener that blends seamlessly into the cream cheese, giving the filling depth without overpowering it. This works especially well in fall desserts where you want a cozy, less processed flavor.
- Vanilla Bean Paste or Vanilla Extract: Vanilla bean paste adds a more concentrated vanilla flavor along with those gorgeous specks throughout the filling. If you don't have paste, a good-quality pure vanilla extract works perfectly to enhance the pumpkin spice flavors.
- Greek Yogurt: It might sound unusual to add Greek yogurt to cheesecake, but it's my secret ingredient. It adds creaminess and a pleasant tang that balances the richness of the cream cheese, while giving the filling a slightly lighter texture. I always use full-fat Greek yogurt at room temperature so it blends in smoothly without lumps.
- Pumpkin Puree: The star of the show-make sure to use 100% pure pumpkin puree, not pumpkin pie filling, which contains added sugar and spices. Pure pumpkin gives you control over the sweetness and spice levels while adding that cozy fall flavor and beautiful golden-orange hue. It's also the key to that unmistakable pumpkin spice cheesecake taste.
- Pumpkin Pie Spice: A warm, fragrant blend of cinnamon, nutmeg, ginger, and cloves that makes the bars taste like autumn in every bite. You can use store-bought or make your own blend for a fresher, more vibrant flavor.
- Lemon Juice: A splash of freshly squeezed lemon juice brightens the filling and cuts through the richness, making each bite feel light and balanced. The acidity also subtly enhances the pumpkin flavor.
- Sea Salt: Just a pinch is enough to bring out the sweetness and spice while balancing the richness of the cream cheese and butter. It's a small step that makes a big difference in flavor.
- Heavy Whipping Cream: Whipped to stiff peaks and gently folded into the filling to create a light, airy, mousse-like texture. This step eliminates the need for baking while ensuring the bars set beautifully in the fridge. Use cold cream for the best whipping results.
See the recipe card for full information on ingredients and quantities.
Substitutions And Variations
- Crust: Swap the graham crackers for gingersnap cookies if you want extra fall spice in every bite. The ginger pairs beautifully with the pumpkin and adds a little kick. If you go this route, you may want to slightly reduce the pumpkin pie spice in the filling so it doesn't overpower the bars.
- Sweetener: I love using coconut sugar for its warm, caramel-like notes, but you can easily swap in organic cane sugar or maple sugar. Cane sugar will give you a slightly more traditional cheesecake sweetness, while maple sugar adds a subtle maple flavor that's perfect for fall.
- Dairy-Free: Yes, you can make these bars dairy-free! Use a good-quality dairy-free cream cheese, a coconut-based whipped topping (or whip your own coconut cream), and a plant-based yogurt. The texture will be slightly different, but still creamy and delicious.
- Extra Spice: If you're a spice lover, add a pinch of cardamom along with the pumpkin pie spice. It adds a light floral warmth that makes the pumpkin flavor pop. You could also add a touch of freshly grated nutmeg for a little extra cozy factor.
- Toppings: While these bars are amazing on their own, you can dress them up for a holiday table. Try sprinkling candied pecans over the top for crunch, drizzling with warm caramel sauce for extra indulgence, or adding a dollop of whipped cream with a dusting of pumpkin pie spice.
How To Make No-Bake Pumpkin Cheesecake Bars
This is an overview with step-by-step photos. Full ingredients & instructions are in the recipe card below.
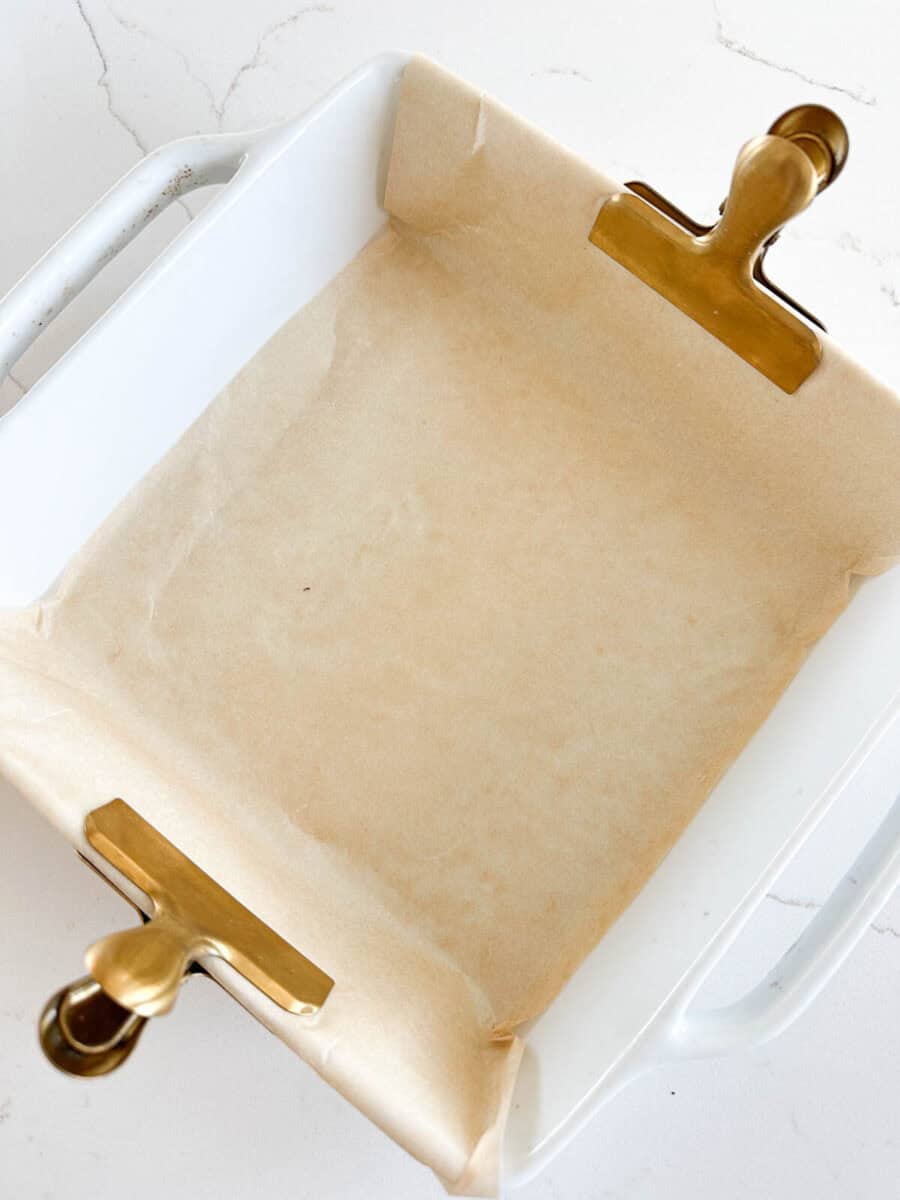
Step 1. Line your 8x8 baking dish with parchment paper, making sure it hangs over the sides for easy removal later. Add your graham crackers to the base of a food processor and pulse until you have fine crumbs. It should look like wet, coarse sand.

Step 2. In a small bowl, add the graham cracker crumbs and melted butter. Stir until the mixture looks like coarse, wet sand. Pour it into the prepared baking dish and use the bottom of a glass jar to press the crumbs down firmly into an even crust.
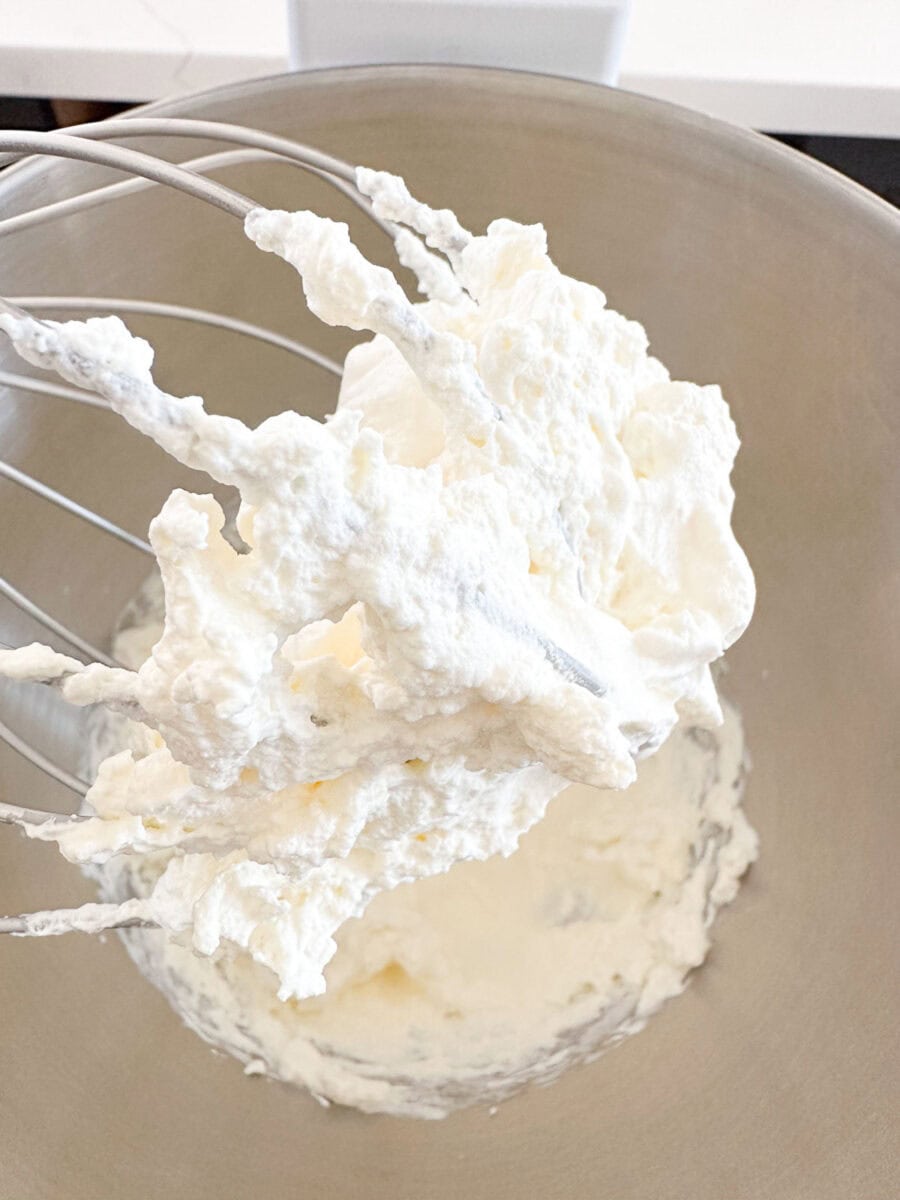
Step 3. In the bowl of your stand mixer fitted with the whisk attachment, beat the heavy whipping cream until stiff peaks form, about 5-8 minutes. Transfer it to a large bowl and place it in the fridge while you prepare the cheesecake filling.

Step 4. Add the cream cheese and coconut sugar to the same stand mixer bowl you used for the whipped cream-there's no need to wash it first. Switch to the paddle attachment and mix until it is completely smooth and creamy.

Step 5. Add the vanilla bean paste, Greek yogurt, pumpkin puree, pumpkin pie spice, lemon juice, and sea salt. Mix again at medium speed until everything is well combined. Scrape down the sides of the bowl with a spatula and mix once more to make sure it is evenly blended.
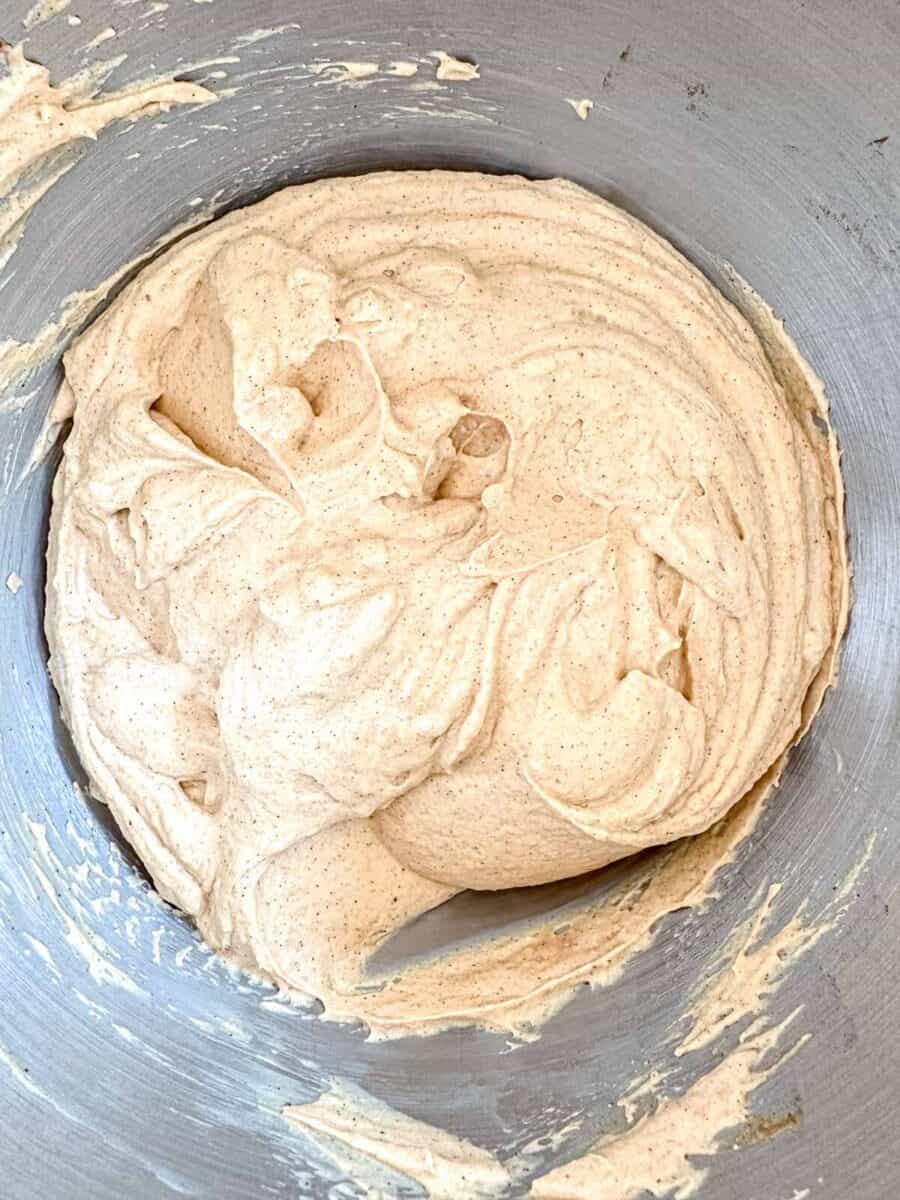
Step 6. Remove the whipped cream from the fridge and gently fold it into the pumpkin cheesecake mixture until no streaks are visible.
Save This Recipe! 📧
How to Fold Whipped Cream into Cheesecake Filling: To keep the filling light and airy, don't stir the whipped cream in like you would other ingredients. Instead, place the whipped cream on top of the pumpkin cheesecake mixture. Using a large spatula, gently lift the mixture from the bottom and fold it over the whipped cream in a slow, sweeping motion. Turn the bowl slightly with each fold and repeat until the two are just combined and no white streaks remain. Overmixing will deflate the whipped cream, making the filling denser.
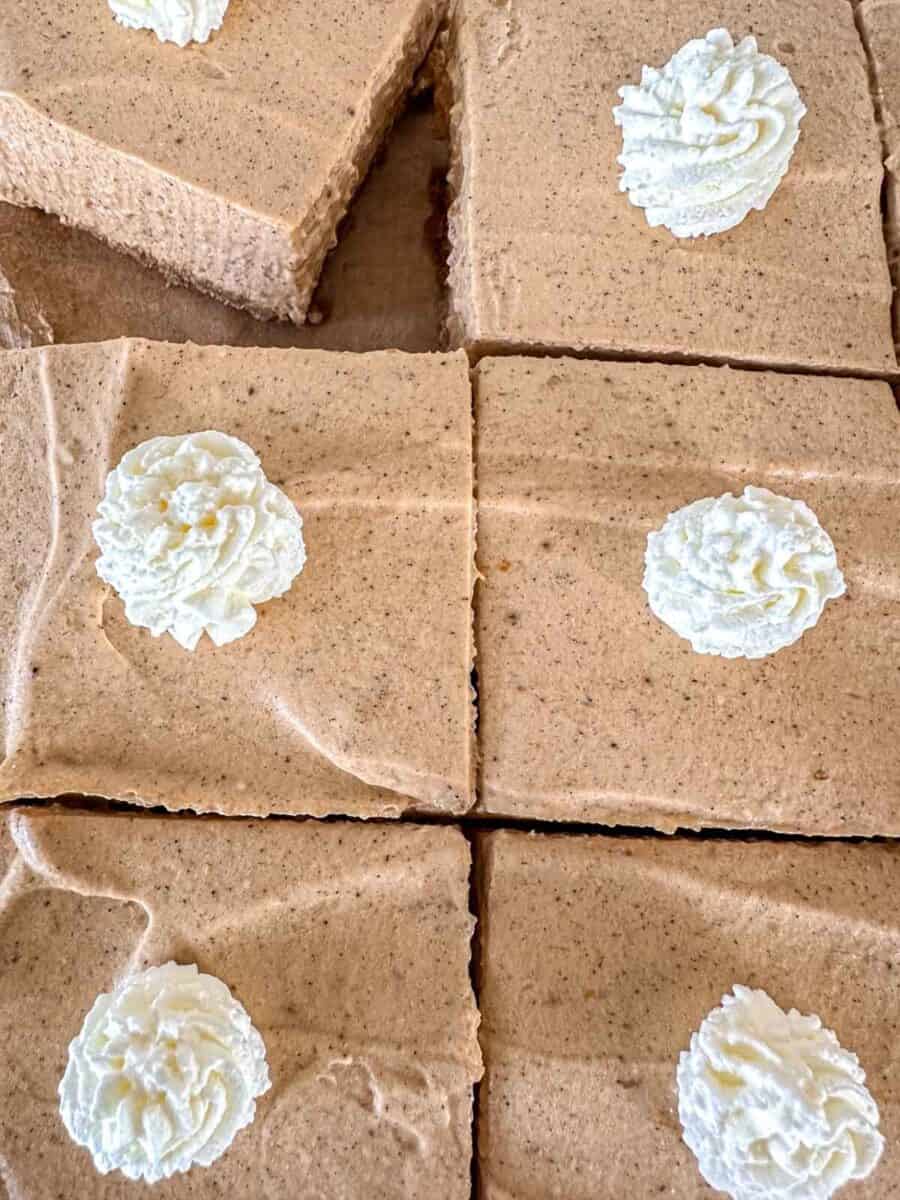
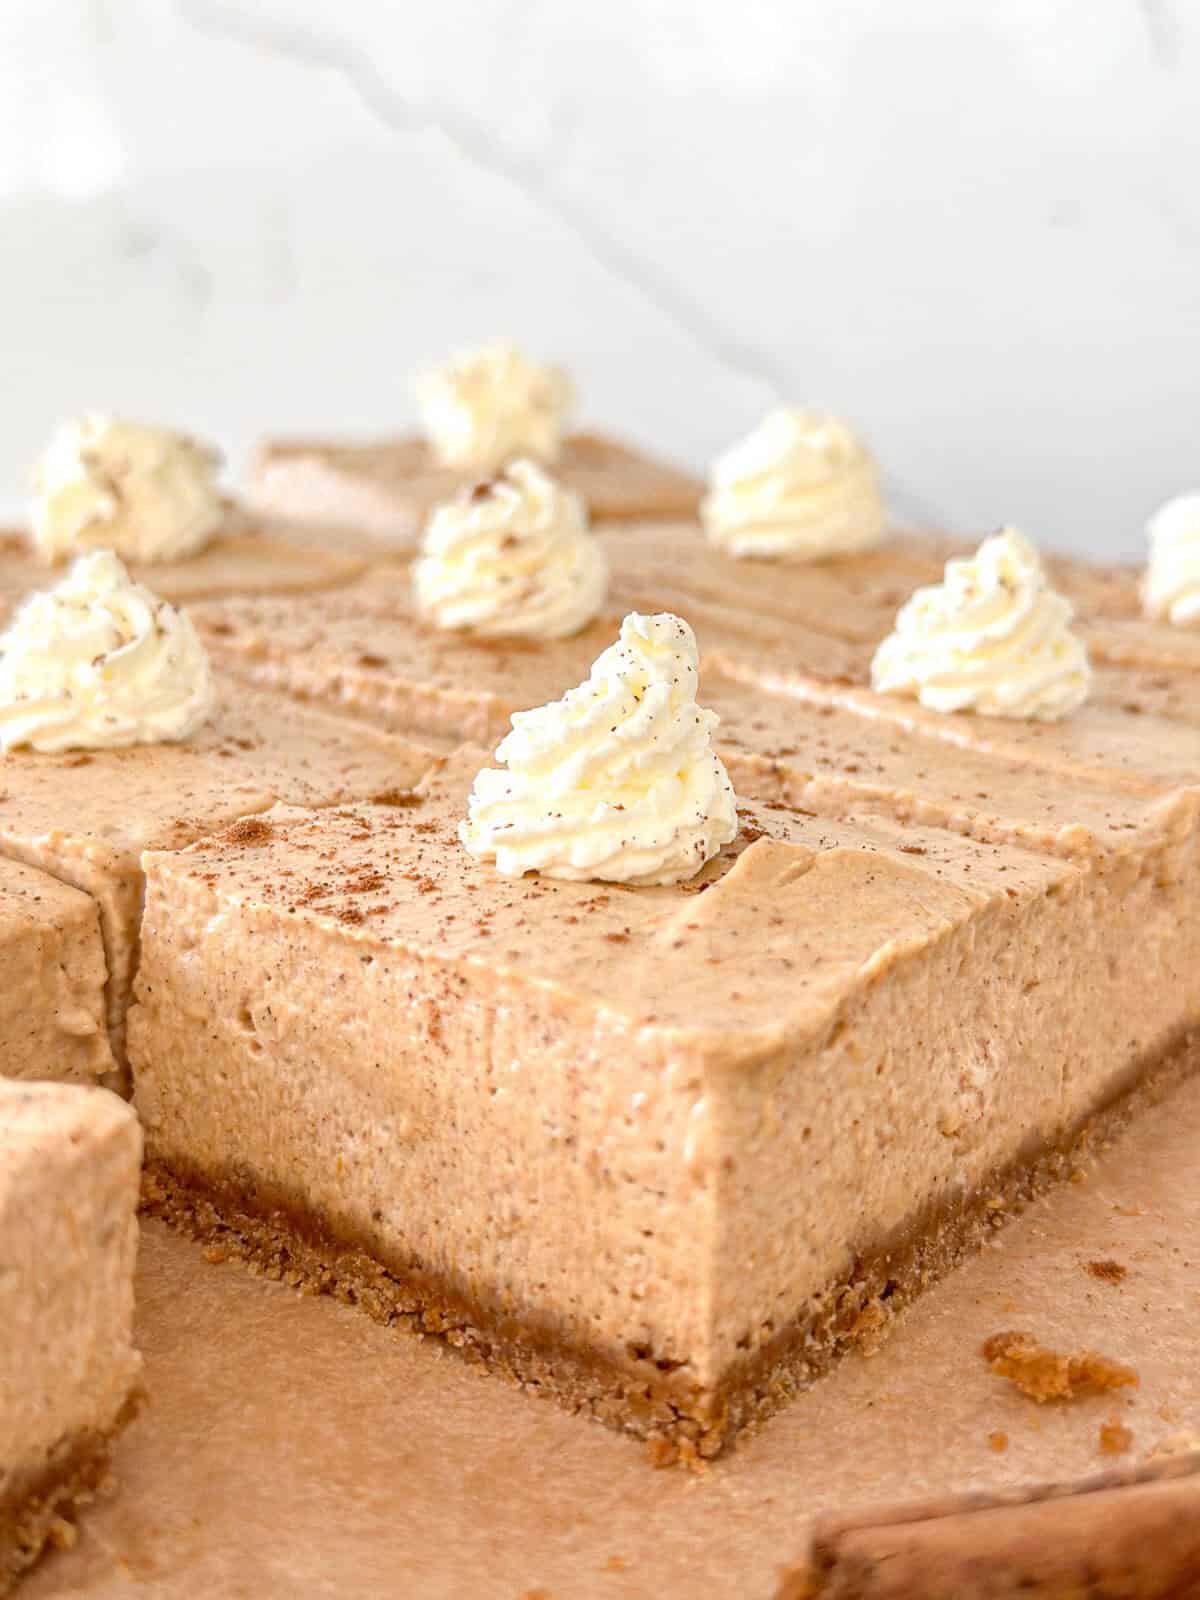
Step 7. Transfer the cheesecake batter to the baking dish and smooth the top with a spatula. Place it in the fridge for 8-24 hours to set. When you are ready to serve, remove the cheesecake from the baking dish using the parchment overhang and cut it into 12 or 16 squares. Top each bar with additional whipped cream and a sprinkle of pumpkin pie spice.
Tip for Clean, Smooth Slices: For picture-perfect bars, place the cheesecake in the freezer for about 1 hour before slicing. This firms up the filling so your knife glides through without dragging. Use a sharp, thin-bladed knife and wipe it clean with a warm, damp cloth between each cut. This extra step keeps the edges neat and bakery-worthy.
Nadia's Expert Tips And Tricks
- Soften your cream cheese completely: Cold cream cheese will give you a lumpy filling, and no one wants that. Let it sit out at room temperature for at least an hour before mixing so it blends smoothly with the other ingredients.
- Go full-fat for the best texture: Full-fat cream cheese and Greek yogurt make a big difference here. They give the filling a rich, velvety texture that holds its shape when sliced. Lower-fat versions can make the bars softer and less stable.
- Fold gently for a light, airy filling: When you add the whipped cream to the pumpkin cheesecake mixture, take your time folding it in. Use a spatula and make slow, sweeping motions from the bottom of the bowl to the top. Stop as soon as no white streaks remain-overmixing will deflate the whipped cream and make the filling denser.
- Make it gluten-free with the right crackers: If you need these bars to be gluten-free, choose a brand like Simple Mills.. They are made with high-quality, real food ingredients that still give you that classic crust texture.
- Give it plenty of chill time: These bars need at least 8 hours in the fridge to set up properly, but they're even better if you can let them chill overnight. This longer chill also makes them a perfect no-bake fall dessert you can prepare the day before serving.
What To Serve With Pumpkin Cheesecake Bars
- Toppings: You can't go wrong with a swirl of freshly whipped cream and a light sprinkle of pumpkin pie spice for that classic fall look (and flavor). If you're feeling a little extra, add a drizzle of caramel sauce or a few candied pecans for crunch.
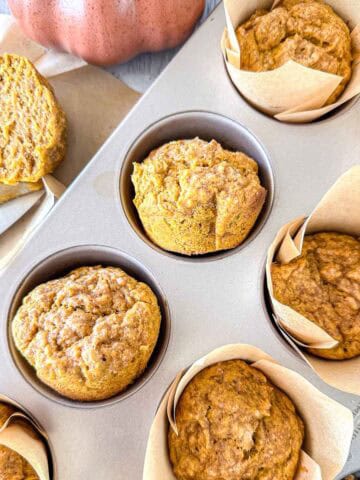
- Fall Dessert Spread: These bars shine on a holiday dessert table. Pair them with Sourdough Pumpkin Muffins, a Gluten-Free Apple Cobbler, or my Apple and Pear Galette for a mix of flavors and textures your guests will love.
- Coffee & Tea: Pumpkin cheesecake bars and coffee are a match made in heaven. Try them with a Pumpkin Spice Latte, an Iced Maple Latte, or just a hot mug of your favorite coffee for the perfect afternoon pick-me-up.
- After-Dinner Treat: These make the sweetest ending to a cozy fall dinner. I love serving them after a savory meal like Butternut Squash Tomato Soup, Butternut Squash Feta Pasta, Dutch Oven Braised Chicken Thighs, or Dutch Oven Chili. The pumpkin spice flavors tie everything together beautifully.
Storage And Reheating
- Storage: Keep your bars in an airtight container in the fridge, and they'll stay fresh for up to 4 days. I like to layer parchment paper between slices if I'm stacking them so the toppings don't smudge.
- Freezing: For longer storage, wrap each bar in parchment paper and place them in a freezer-safe bag or container. They'll keep for up to 1 month. When you're ready to enjoy, thaw them in the fridge overnight.
- No reheating needed: These bars are meant to be served chilled-straight from the fridge is when they taste their best.
Recipe FAQs
Absolutely! No-bake pumpkin cheesecake bars are a dream for make-ahead desserts. You can prepare them 1-2 days in advance-just keep them covered in the fridge until you're ready to serve. They're one of my favorite make-ahead fall desserts for holiday gatherings because they free up oven space and are ready to slice and serve straight from the fridge.
I wouldn't. Pumpkin pie filling already has sugar and spices mixed in, which will change both the flavor and texture of the bars. Stick with pure pumpkin puree so you can control the sweetness and spice.
A stand mixer or hand mixer will make things much easier, especially for whipping the cream and getting a smooth filling. You can do it by hand if you're up for a little workout, but it takes some patience.
It may seem like a small ingredient, but it makes a big difference. The lemon juice brightens the flavors and keeps the cheesecake filling from tasting too heavy.
You can, but it will change the flavor and texture. Freshly whipped cream gives these bars the best light, airy consistency.
Pop the cheesecake in the freezer for about an hour before cutting. Use a sharp knife and wipe it clean between each cut for those picture-perfect slices.
More Fall Recipes You'll Love

If you tried this recipe please leave a 🌟 star rating and let me know how it went in the 📝 comments below. You can also stay in touch through social media by following along on Instagram, Pinterest, YouTube, or Facebook. Thanks for visiting today!
No Bake Pumpkin Cheesecake Bars (Easy Recipe)
Ingredients
- 1 ½ cup Graham Cracker Crumbs Simple Mills
- 4 tablespoons Unsalted Butter melted
- 8 oz Cream Cheese full-fat softened to room temperature
- ½ cup Coconut Sugar
- 1 teaspoon Vanilla Bean Paste
- ½ cup Greek Yogurt full-fat, room temperature
- ¾ cup Pumpkin Puree
- 1 ½ teaspoon Pumpkin Pie Spice
- ½ teaspoon Lemon Juice fresh
- ⅛ teaspoon Sea Salt
- 1 cup Heavy Whipping Cream cold
Instructions
- Line your 8x8 baking dish with parchment paper, making sure it hangs over the sides for easy removal later. Add your graham crackers to the base of a food processor and pulse until you have fine crumbs. It should look like wet, coarse sand.
- In a small bowl, add the graham cracker crumbs and melted butter. Stir until the mixture looks like coarse, wet sand. Pour it into the prepared baking dish and use the bottom of a glass jar to press the crumbs down firmly into an even crust.1 ½ cup Graham Cracker Crumbs, 4 tablespoons Unsalted Butter
- In the bowl of your stand mixer fitted with the whisk attachment, beat the heavy whipping cream until stiff peaks form, about 5-8 minutes. Transfer it to a large bowl and place it in the fridge while you prepare the cheesecake filling.1 cup Heavy Whipping Cream
- Add the cream cheese and coconut sugar to the same stand mixer bowl you used for the whipped cream-there's no need to wash it first. Switch to the paddle attachment and mix until it is completely smooth and creamy.8 oz Cream Cheese , ½ cup Coconut Sugar
- Add the vanilla bean paste, Greek yogurt, pumpkin puree, pumpkin pie spice, lemon juice, and sea salt. Mix again at medium speed until everything is well combined. Scrape down the sides of the bowl with a spatula and mix once more to make sure it is evenly blended.1 teaspoon Vanilla Bean Paste, ½ cup Greek Yogurt , ¾ cup Pumpkin Puree, 1 ½ teaspoon Pumpkin Pie Spice, ½ teaspoon Lemon Juice , ⅛ teaspoon Sea Salt
- Remove the whipped cream from the fridge and gently fold it into the pumpkin cheesecake mixture until no streaks are visible.
- Transfer the cheesecake batter to the baking dish and smooth the top with a spatula. Place it in the fridge for 8-24 hours to set. When you are ready to serve, remove the cheesecake from the baking dish using the parchment overhang and cut it into 12 or 16 squares. Top each bar with additional whipped cream and a sprinkle of pumpkin pie spice.
Notes
- Soften your cream cheese completely: Cold cream cheese will give you a lumpy filling, and no one wants that. Let it sit out at room temperature for at least an hour before mixing so it blends smoothly with the other ingredients.
- Go full-fat for the best texture: Full-fat cream cheese and Greek yogurt make a big difference here. They give the filling a rich, velvety texture that holds its shape when sliced. Lower-fat versions can make the bars softer and less stable.
- Fold gently for a light, airy filling: When you add the whipped cream to the pumpkin cheesecake mixture, take your time folding it in. Use a spatula and make slow, sweeping motions from the bottom of the bowl to the top. Stop as soon as no white streaks remain-overmixing will deflate the whipped cream and make the filling denser.
- Make it gluten-free with the right crackers: If you need these bars to be gluten-free, choose a brand like Simple Mills.. They are made with high-quality, real food ingredients that still give you that classic crust texture.
- Give it plenty of chill time: These bars need at least 8 hours in the fridge to set up properly, but they're even better if you can let them chill overnight. This longer chill also makes them a perfect no-bake fall dessert you can prepare the day before serving.


Leave a Reply