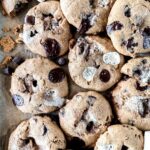
Brown Butter S'mores Cookies
This Brown Butter S'mores Cookies recipe is all about taking a campfire classic and giving it a delicious twist. It’s the perfect cookie to enjoy whether you’re channeling summer vibes or just looking for something extra special to bake.
Servings: 12 cookies
Calories: 233kcal
Ingredients
- 12 tablespoons Butter
- 1 cup Gluten-Free Flour
- ¼ Almond Flour
- ½ teaspoon Baking Powder
- ¼ teaspoon Baking Soda
- ¼ teaspoon Sea Salt
- ½ teaspoon Cinnamon
- 2 Eggs
- ½ cup Coconut Sugar
- ¼ cup Date Sugar
- 1 teaspoon Vanilla Extract
- 1 cup Chocolate Chips hu gems
- ¾ Graham Crackers simple mills
- 1 cup Marshmallows no high-fructose corn syrup
Instructions
- In a medium saucepan over medium heat melt the butter. Stir the butter frequently, and continue to cook the butter until it starts to brown and has a nutty scent. Remove it from the heat and allow it to cool completely.
- In a large bowl, sift together the gluten-free flour, almond flour, baking soda, baking powder, sea salt, and cinnamon.
- Add the eggs, coconut sugar, date sugar, vanilla, and cooled melted butter to the bowl of your stand mixer. Using the paddle attachment, mix everything on low to medium speed until combined and smooth.
- Slowly add the flour mixture (dry ingredients) to the butter and sugar mixture (wet ingredients), and mix until almost combined. You should still see some flour streaks at this point. Add ¾ cup of the chocolate chips and the graham crackers and mix again until everything is combined. Cover the bowl with plastic wrap and place in the fridge for 1 hour
- Once the cookie dough has chilled, preheat your oven to 350 degrees f. Line your baking sheet with parchment paper and use a 2-inch ice cream scoop to scoop the dough into balls. The dough should make 12 cookies.
- Place a marshmallow in the center of each dough ball and carefully fold the dough around it to cover the marshmallow completely. This will ensure it does not ooze out! Shape the dough into a ball and set it on the lined baking sheet. Press gently to flatten slightly.
- Bake for 10-12 minutes or until the edges start to turn golden brown. Remove from the oven and immediately add a few more chocolate chips and small pieces of marshmallow to the top of each cookie. Allow the cookies to cool for 10 minutes then transfer them to a cooling rack.
Notes
Expert Tips And Notes
- Brown Butter: Browning butter can seem intimidating, but it really is simple! Just be sure to watch it closely, as it can burn very quickly. Once you start to see the brown bits forming, turn the heat off and continue to stir the melted butter as it will continue to cook.
- Chill Time: You don't want to skip this step! This is a really wet dough that can be hard to work with if you don't let it chill. Also, chilling the dough allows the flavors to fully develop. If you are baking your cookies in two batches, place the dough back in the fridge while you bake the first batch.
- Oven Temperatures May Vary: Once your cookies has been in the oven for 8 minutes, keep an eye on them. Oven temperatures tend to vary, so your cookies may be ready in 8 minutes and some ovens may take closer to 12 minutes. If you like crispy edges you may want to bake them for a few extra minutes.
Nutrition
Calories: 233kcal | Carbohydrates: 42g | Protein: 3g | Fat: 7g | Saturated Fat: 4g | Polyunsaturated Fat: 0.3g | Monounsaturated Fat: 2g | Trans Fat: 0.05g | Cholesterol: 1mg | Sodium: 229mg | Potassium: 95mg | Fiber: 2g | Sugar: 23g | Vitamin A: 8IU | Vitamin C: 0.01mg | Calcium: 59mg | Iron: 2mg
